Github Actions配置CI和CD

前言:
阅读这篇文章我能学到什么?
  GitHub Actions 是 GitHub 提供的自动化工作流工具,对开源仓库完全免费所有功能,并且基于用户的资源是相对比较慷慨的。

1 介绍

  GitHub Actions是GitHub提供的持续集成和持续部署 (CI/CD) 平台,允许开发者自动化代码构建、测试、打包和部署流程。它通过 YAML 配置文件定义工作流(Workflow),在代码推送、PR 提交或定时任务等事件触发时自动执行任务。这些操作人工也能完成,但使用Actions在特定的场景自动触发完成,将大大提高开发效率。
  GitHub Actions是GitHub提供的自动化工作流工具,主要功能如下。

  • 自动运行测试(CI)
  • 自动部署代码(CD)
  • 定时执行任务(如每日构建)
  • 响应GitHub事件(如 push、pull_request,有的地方叫merge_request,是一个东西)

  相比其他CI/CD工具,Actions具有以下优势。

  • 深度集成 GitHub:直接与仓库、PR、Issue 联动。
  • 丰富的 Action 市场:重用社区共享的 Action(如部署到 AWS、发送通知)。
  • 多平台支持:Linux/Windows/macOS 环境,支持 Docker 容器。
  • 免费额度:公开仓库完全免费,私有仓库每月 2,000 分钟(Linux)。

  详细的可以参考 Actions官方文档
  熟悉Actions需要了解这些术语。

  • workflow(工作流程):持续集成一次运行的过程,就是一个 workflow。
  • job(任务):一个 workflow 由一个或多个 jobs 构成,含义是一次持续集成的运行,可以完成多个任务。
  • step(步骤):每个 job 由多个 step 构成,一步步完成。
  • action(动作):每个 step 可以依次执行一个或多个命令(action)。

2 搭建GitHub Actions CI/CD

  在工程根目录下执行以下指令创建目录。

1
mkdir -p .github/workflows/

  在该目录下创建文件 cicd.yml ,模板如下。
  不用急着手动配置,可以在Github上根据需要模板,在官方自动生成的配置基础上修改。为工程配置Actions,其实就是配置 .github/workflows/ 目录下的CI/CD的yaml文件,非常简单。

1
2
3
4
5
6
7
8
9
10
11
12
13
14
15
16
17
18
19
20
21
22
23
24
25
26
27
28
29
30
31
32
33
34
35
36
37
38
39
40
41
42
name: CI/CD Pipeline  # 工作流名称

on:
push:
branches: [ main ] # 在 main 分支 push 时触发
pull_request:
branches: [ main ] # 在 main 分支 PR 时触发

jobs:
build-and-test: # 任务名称
runs-on: ubuntu-latest # 运行环境(Ubuntu Linux)

steps:
- name: Checkout code # 检出代码
uses: actions/checkout@v4

- name: Set up Python # 安装 Python
uses: actions/setup-python@v4
with:
python-version: '3.10'

- name: Install dependencies # 安装依赖
run: |
pip install -r requirements.txt

- name: Run tests # 运行测试
run: |
python -m pytest

deploy: # 部署任务(示例:部署到 GitHub Pages)
needs: build-and-test # 依赖 build-and-test 任务
runs-on: ubuntu-latest

steps:
- name: Checkout code
uses: actions/checkout@v4

- name: Deploy to GitHub Pages
uses: peaceiris/actions-gh-pages@v3
with:
github_token: ${{ secrets.GITHUB_TOKEN }}
publish_dir: ./public

  如果需要Node.js项目构建,可在 steps 中添加以下。

1
2
3
4
5
6
7
8
9
10
- name: Install Node.js
uses: actions/setup-node@v3
with:
node-version: '18'

- name: Install dependencies
run: npm install

- name: Run tests
run: npm test

  如果需要Docker构建并推送,可在 steps 中添加以下。

1
2
3
4
5
6
7
8
9
10
11
- name: Login to Docker Hub
uses: docker/login-action@v2
with:
username: ${{ secrets.DOCKER_USERNAME }}
password: ${{ secrets.DOCKER_PASSWORD }}

- name: Build and push
uses: docker/build-push-action@v4
with:
push: true
tags: user/app:latest

  如需要部署到云服务器,可在 steps 中添加以下。

1
2
3
4
5
6
7
8
9
10
11
- name: Deploy via SSH
uses: appleboy/ssh-action@v1
with:
host: ${{ secrets.SSH_HOST }}
username: ${{ secrets.SSH_USERNAME }}
key: ${{ secrets.SSH_PRIVATE_KEY }}
script: |
cd /var/www/app
git pull
npm install
pm2 restart app

  在Github上打开要配置Actions的开源仓库,点击 Actions 可以看到Github已经为我们提供了一些配置模板,直接选择最贴近自己需要的点击 Configure 即可。
  比如我这选择一个使用cmake构建的单平台环境,后续仍然可以自己配置扩展多平台。
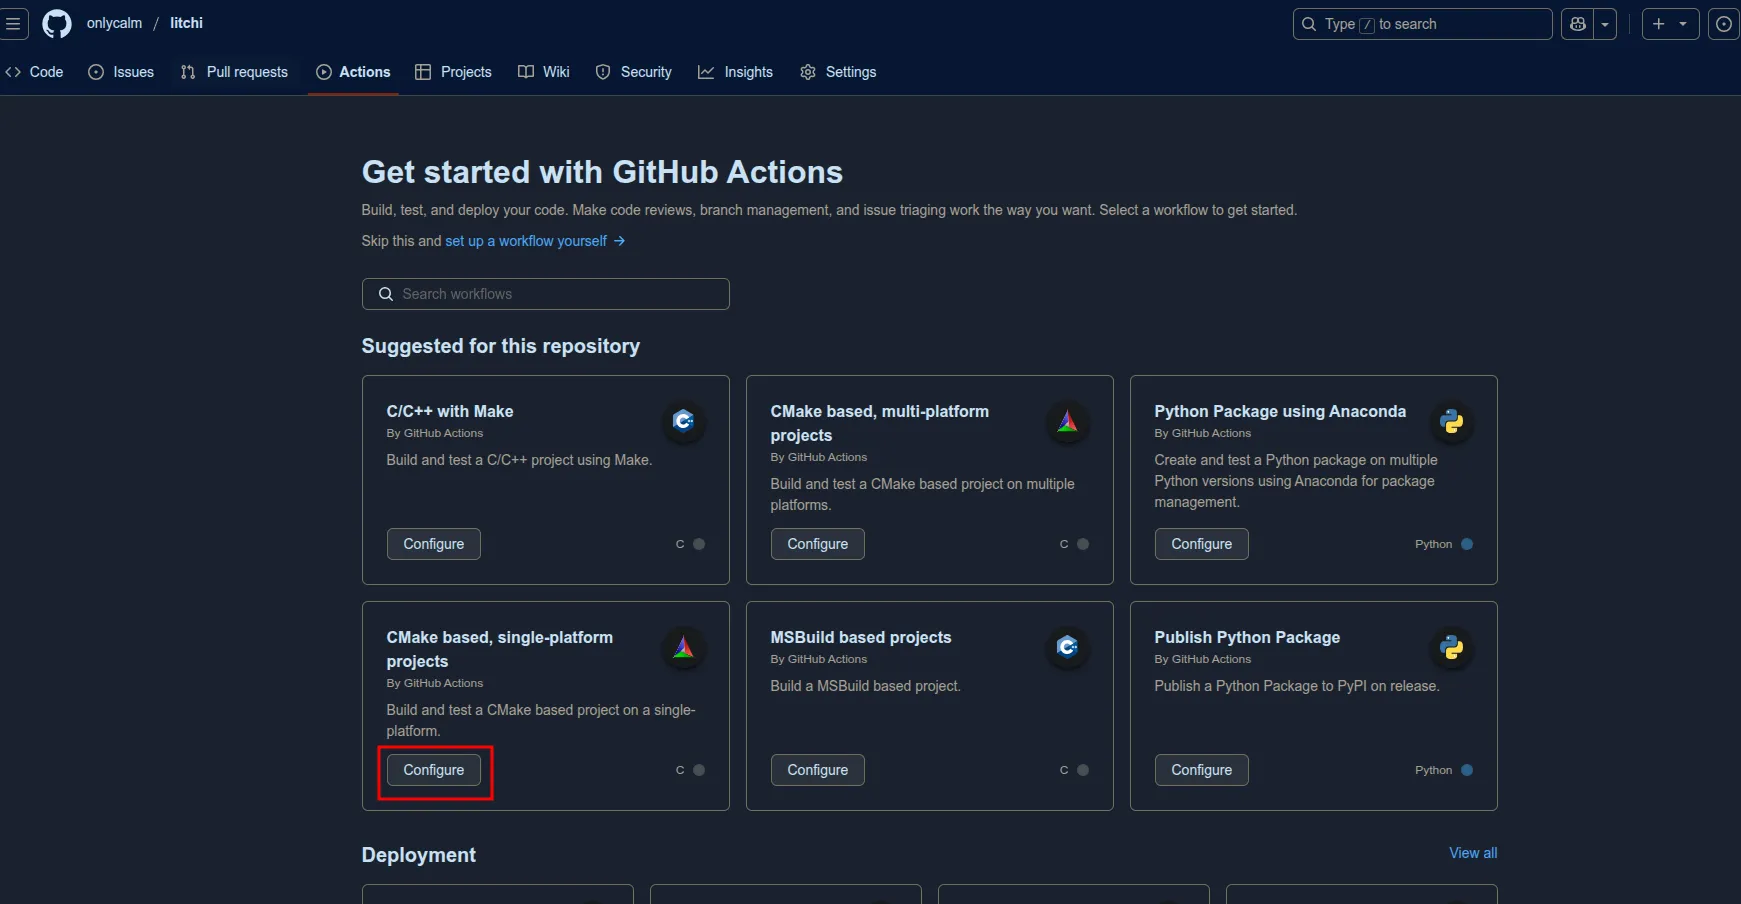
Configure.png

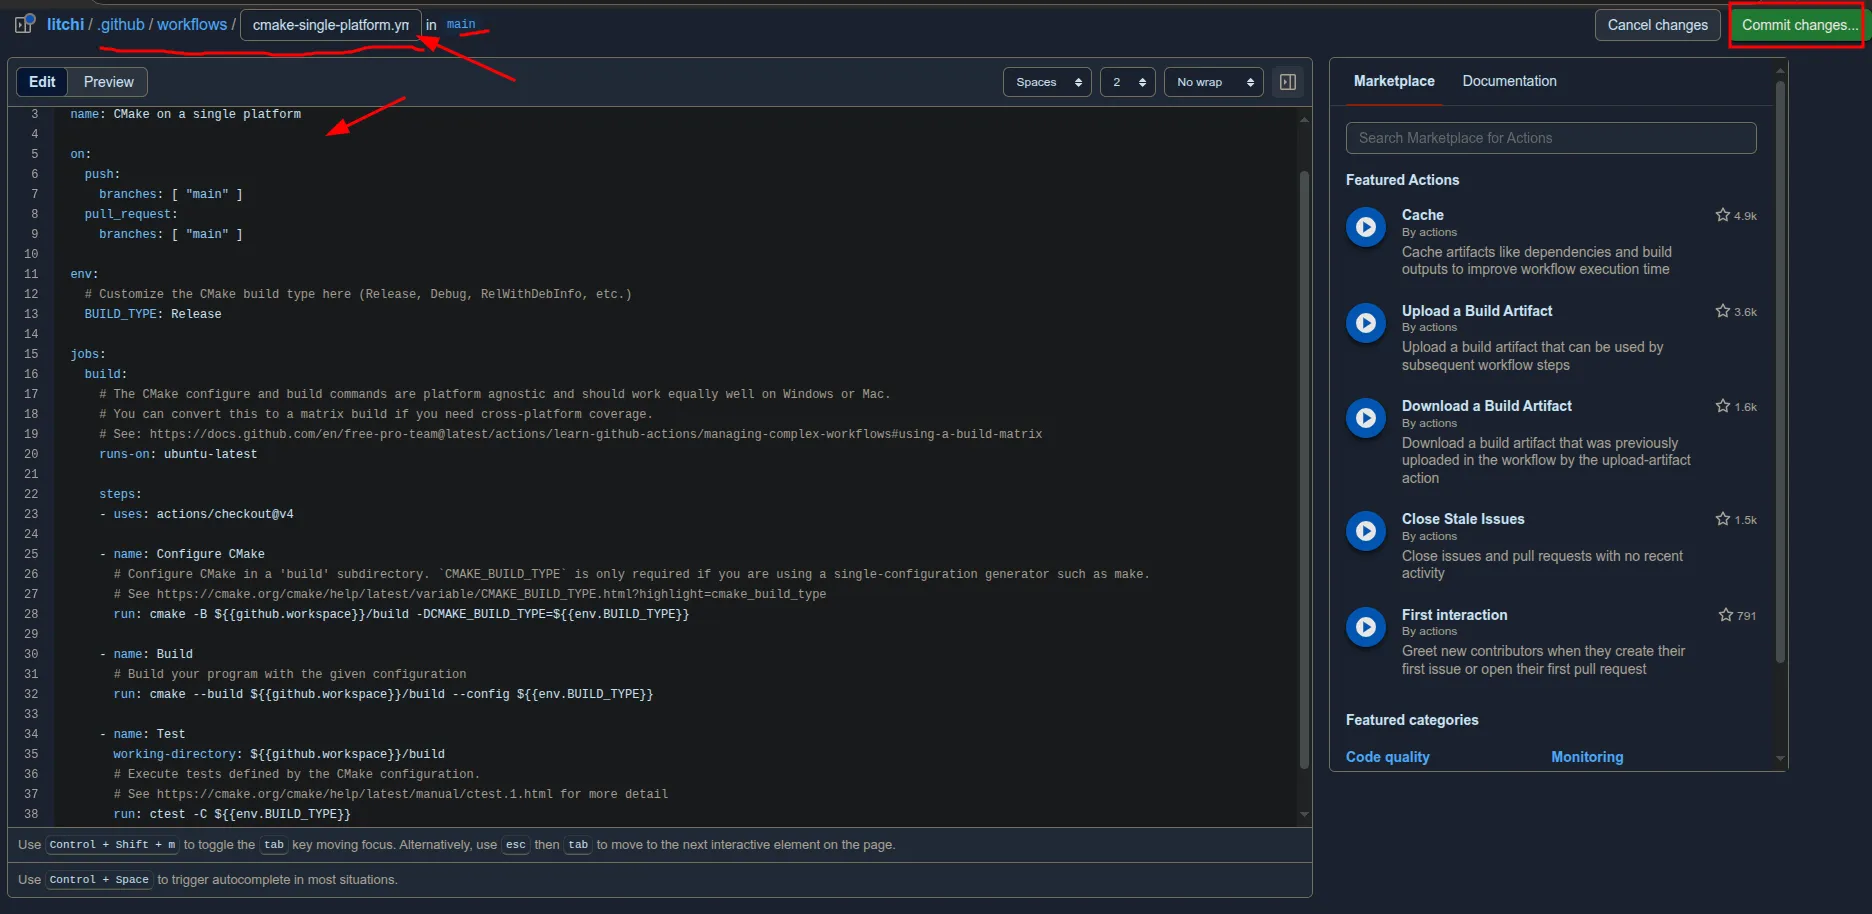
  我们可以看到Github帮我们自动生成了yaml配置。基于官方给出的配置模板,可以修改文件名,配置内容后点击 Commit changes

Yaml.png

1
2
3
4
5
6
7
8
9
10
11
12
13
14
15
16
17
18
19
20
21
22
23
24
25
26
27
28
29
30
31
32
33
34
35
36
37
38
# This starter workflow is for a CMake project running on a single platform. There is a different starter workflow if you need cross-platform coverage.
# See: https://github.com/actions/starter-workflows/blob/main/ci/cmake-multi-platform.yml
name: CMake on a single platform

on:
push:
branches: [ "main" ]
pull_request:
branches: [ "main" ]

env:
# Customize the CMake build type here (Release, Debug, RelWithDebInfo, etc.)
BUILD_TYPE: Release

jobs:
build:
# The CMake configure and build commands are platform agnostic and should work equally well on Windows or Mac.
# You can convert this to a matrix build if you need cross-platform coverage.
# See: https://docs.github.com/en/free-pro-team@latest/actions/learn-github-actions/managing-complex-workflows#using-a-build-matrix
runs-on: ubuntu-latest

steps:
- uses: actions/checkout@v4

- name: Configure CMake
# Configure CMake in a 'build' subdirectory. `CMAKE_BUILD_TYPE` is only required if you are using a single-configuration generator such as make.
# See https://cmake.org/cmake/help/latest/variable/CMAKE_BUILD_TYPE.html?highlight=cmake_build_type
run: cmake -B ${{github.workspace}}/build -DCMAKE_BUILD_TYPE=${{env.BUILD_TYPE}}

- name: Build
# Build your program with the given configuration
run: cmake --build ${{github.workspace}}/build --config ${{env.BUILD_TYPE}}

- name: Test
working-directory: ${{github.workspace}}/build
# Execute tests defined by the CMake configuration.
# See https://cmake.org/cmake/help/latest/manual/ctest.1.html for more detail
run: ctest -C ${{env.BUILD_TYPE}}

  在main分支上产生一个commit,将配置提交到主分支上(也可手动推上去)。
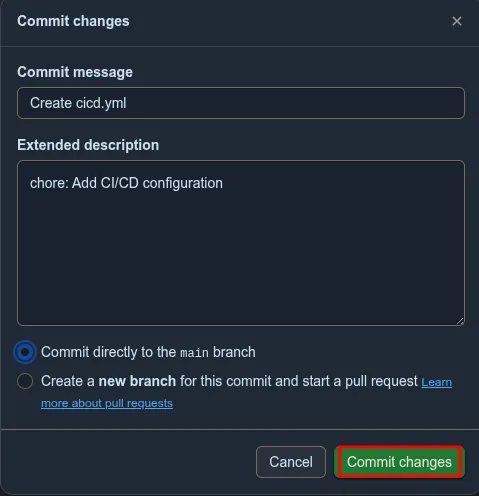
Cmt.png

3 查看runs结果

  打开开源仓库,再次点击 Actions ,我们配置了main分支push时触发流水线作业,而刚刚又为了配置CI/CD在main分支commit了,此时可查看runs结果。

runs.png

  可看到产生报错,点进取查看具体的执行log可分析原因。

log.png

4 配置

4.1 触发条件

  比如以下代码配置了 main 分支发生 push 动作后触发CI/CD。一般我们将主分支设置为保护分支,不允许直接push,所以这个配置通常是不需要的。 pull_request 配置的分支表示其他分支向该分支发起mr时自动触发CI/CD。

1
2
3
4
5
on:
push:
branches: [ "main" ]
pull_request:
branches: [ "main" ]

4.2 安装指定版本cmake

  以下代码通过Actions安装指定版本的cmake,安装完后输出版本号。

1
2
3
4
5
- name: Install CMake
uses: actions/setup-cmake@v3
with:
cmake-version: "3.22.1"
run: cmake --version

 &esmp;linux环境下也可用apt安装。

1
2
3
4
- name: Install cmake
run: |
# sudo apt-get install cmake=3.22.*
sudo apt-get install cmake

4.3 安装指定版本python3

  以下代码通过Actions安装指定版本的python3,安装完后输出版本号。

1
2
3
4
5
- name: Install Python3
uses: actions/setup-python@v4
with:
python-version: '3.10.12'
run: python3 --version